
Today is all about homemade pumpkin puree. I hardly cook with pumpkins and the first time I used pumpkin was for this pumpkin chocolate chip muffin. Ever since I made the muffins, I had wanted to make the puree at home. I am not against canned stuff and would be more than happy to use in a pinch, but I also like to make things from scratch time permitting. My first question was what pumpkin to use for the puree. I asked my friends and they mentioned the pie-pumpkin. It sounded new and I was waiting to hit the grocery store to see what it is all about.
Well, the pie-pumpkins are these cute tiny pumpkins and I was happy to find them in the store. I grabbed one and headed home to start the baking. Everything went per plan and the puree was ready in no time, actually in an hour ![]() . But the good part was that I did not have to babysit the pumpkin and I was free to do other tasks while they were baking. I pureed the pumpkin in an Indian blender and added enough water needed for the blades to move. I froze the puree since I was not sure if I would be able to use it before we go on vacation. They freeze pretty good. Let us get to baking some pumpkins. Off to the recipe.
. But the good part was that I did not have to babysit the pumpkin and I was free to do other tasks while they were baking. I pureed the pumpkin in an Indian blender and added enough water needed for the blades to move. I froze the puree since I was not sure if I would be able to use it before we go on vacation. They freeze pretty good. Let us get to baking some pumpkins. Off to the recipe.
Homemade Pumpkin Puree
Making pumpkin puree at home by roasting the pumpkin in the oven and then pureeing using the blender.
Ingredients:
- pumpkin - small one
Instructions:
1. Select small pumpkins (pie-pumpkin) and slice into two.
2. Scoop out seeds and strings. Cut each half into 2 pieces.
3. Place the pieces in a preheated 350F for 45 min to an hour depending on the size of the pumpkin.
4. Remove from oven when the pumpkin pieces are fork tender and allow to cool for a few minutes.
5. Peel the skin using a knife if needed.
6. Take in a blender and puree using water. Adjust the quantity of water to the desired thickness of the puree.
7. Freeze for later or store in the refrigerator and use within a week.
My Notes
1. Keep an eye because sometimes the pumpkins could get burnt.
2. To freeze the puree: Place one cup or 2 cups of the puree in a ziploc cover. Flatten the cover and place in freezer.
Last Year: Waldorf Salad
Pictorial
1. Pumpkin ready for slicing. Small pumpkins need to be used for this. At the store they were marked as pie-pumpkins. 2. Sliced into two.
 3. Using a spoon, scoop out the seeds and strings.
 4. Scooped and ready. Cut each half into 2 pieces.
 5. Place on a baking sheet and bake in a preheated 350F oven for 45 minutes to an hour depending on the size of the pumpkin.
 6. Out of the oven. Allow to cool for a few minutes.
 7. You should be able to pierce with a fork easily when the pumpkin is cooked.
 8. Peel the skin. If the skin gets stuck here and there and does not come off, use a knife.
 9. Take the peeled pieces in a blender or food processor.
  10. Using water make a puree. Adjust the quantity of water to the thickness you would like.
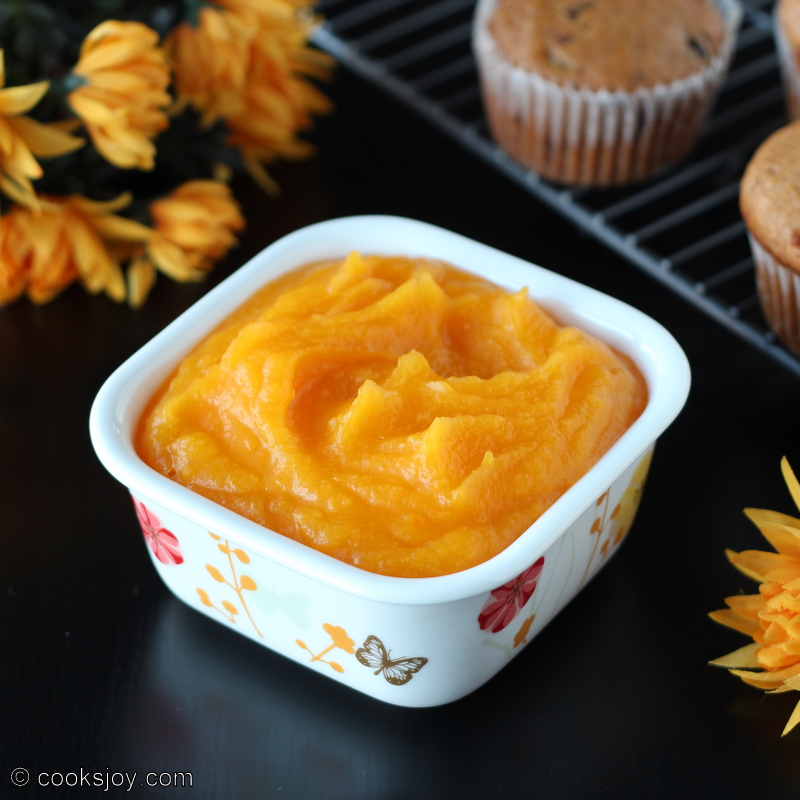
 Puree ready for goodies like muffins, pies, pancakes and so on. Freeze for later or store in the refrigerator and use within a few days.
 Enjoy!
Sending to Halloween Fiesta hosted here.

Linking to Bake Fest #12 hosted at Fun and Food Cafe.

Linking to Basics, Tips & Tricks.


I make my own too! I went to a pumpkin farm in North GA and got my own sugar pumpkin… it had such natural sweetness that beat the store!
http://lifewithlampnsofa.com/2012/10/19/pumpkin-spice-granola-a-trip-to-berts-pumpkin-patch/
I always make my own pumpkin puree. Yours looks super smooth and creamy.
Thank you for sharing!
Angie
Great tutorial for Halloween and the pictures are fantastic.
Nice recipe perfect for the halloween season!!
Thanks for sharing! Its so much better to make this at home
Awesome pictorial presentation
Nice way of describing the method.
Picture looks gorgeous, nice puree